Tuesday, April 30, 2013

Blocks of the Month - FWMQG

My guild, the Fort Worth Modern Quilt Guild is doing a block of the month challenge.  The board members (myself included) are each choosing a block for the month and presenting it to the members. So far we have made these blocks:

BOM 8 pointed star

BOM

Both from the Fat Quarterly Shape Workshop Book

February BOM - Wonky Pinwheel

Wonky Pinwheel Block

Block of the Month

Scrappy Block

Star Block

Another Star

Along with these blocks there have been some that didn't make the cut! These are my 'not quite' blocks - the ones I thought we might do that just didn't come out good enough.

Triangle Block

Triangle Wheel - can't get the block to lie flat

Octogonal Orb Block

Octogonal Orb Block - this one failed because we tried to size it down to 12.5"

Mod Mosaic Block

Mod Mosaic Block - too messy looking - needs to be planned out more


Whew! I'm planning on using my 'failures' on the back of the quilt - I'm sure I'll have a few more!


Monday, April 29, 2013

Modern Half-Square Triangle Quilt-a-Long Block 34

Welcome! If you are just joining us, information about materials can be found here, and here are the previous blocks: Block 1Block 2Block 3Block 4Block 5Block 6Block 7Block 8Block 9Block 10Block 11Block 12Block 13, Block 14Block 15Block 16Block 17Block 18Block 19Block 20Block 21Block 22Block 23Block 24Block 25Block 26Block 27Block 28Block 29Block 30Block 31Block 32Block 33.

Block 34


Materials:
8 3.5" squares of Color A
8 3.5" squares of Color B

*note* these are the essential materials for each block, so you can cut several blocks worth of fabric at once to save time!

Create your blocks, following the same procedure as last week. If you need help making your blocks, please see this post. You should end up with 16 2.5" squares. Ready to lay out your block? Here we go!


ROW 1


ROW 2


ROW 3


ROW 4

After you have sewn your squares into rows, press your seams. I like to press odd numbered rows to the left, and even to the right. It helps to use a small piece of paper to number your rows. I like the tiny post-it notes. 

After pressing, you are ready to sew your rows together! Pin, if necessary, but I find that these short rows don't require pinning.

Block 34

Press one final time, and voila! Another finished block! Only 38 to go! Pat yourself on the back! Remember to add your blocks to our flickr group!

Please, if you have questions, email me at knitnlit AT gmail DOT com, or make sure you leave your email address in your comment. I've had several folks ask questions in the comments, but if you are a no-reply commenter, I can't email you back. 


Friday, April 26, 2013

KCW Spring 2013: Ice Cream dresses

This pattern was the first one I saw of the Oliver + S patterns when I first started getting interested in sewing clothes for the kids. (That's a poor sentence!) I thought it was just so cute - and I love the top and the dress versions. Of course, it's one of the last patterns of theirs I've made (of the ones I own!). But these came out so cute I know I'll be making more!

Ice cream dress for Ellie

I used some of Sarah Jane's adorable whales/narwhals print for the body of Ellie's dress and some pink dot I had in the stash. I didn't do the v notch on the pockets because I just didn't feel like it (a little burnt out!). There is an adorable pink penguin button on the back - I couldn't resist a fun button!

Ice cream dress for Samantha

For Samantha's dress I used this black gingham I picked up from the remnant basket at JoAnn's back in the fall and paired it with the cute Michael Miller giraffes. This gingham is fantastic - has a really nice feel and weight to it! I will be searching out more of it! Samantha's dress is PLENTY big, but she will comfortably wear it for probably two years.

I also made freezer paper stenciled shirts for the kids for Ben and Ellie's birthday tomorrow, but I'll share those in the party roundup post!

I made far fewer things this spring than I did in the fall, but most of that is due to having more active kiddos and a giant preggo belly.

One of my friends asked me what she thought I spent on their clothes between the cost of fabric and my time. I know it is far more expensive than most things I could buy at Target or Old Navy, but I don't count my time - I'm going to do something with my naptime (and it's not cleaning!), and I enjoy making clothes and crafting/sewing/knitting. She wondered how long I could make clothes before they started getting teased at school, which is an issue I hopefully won't have to worry about for a long time. Additionally, with the amazing prints and fabrics available today, many 'popular' looks can be replicated with handmade. And honestly, I think part of the joy for me in this is that they are not wearing the same screen-printed tv character t-shirt that all their classmates are wearing. They also use handmade lunch supplies (and real food in their lunch!), a handmade backpack, wear handknit sweaters, etc. Right now Samantha is at an age where she LOVES everything that mommy makes - and I'm no fool - I know this won't last forever. I will take it for as long as I can! I also think that in today's world there is room for individuality - I don't want my kids to be like everyone else. I want them to think for themselves, and wear what they like. It helps that right now they don't watch TV or have screen time - they are not sucked into that consumerism.

Sorry for the little 'rant' - but I am very interested to know from others what they think about making their children's clothes, especially those with older children! What do you all think?

Thursday, April 25, 2013

KCW Spring 2013: Shirts and dresses

Untitled

Yesterday I finished up several more shirts for Ben using my old t-shirts. I widened the neckline on these a bit more, hopefully they'll fit ok - he is cutting his 2 year molars so I haven't wanted to bug him more than necessary, so we haven't tried them on.

Untitled

Untitled

Untitled

Untitled

I also finished up two Seashore Sundresses for the girls. I was a bit confused by the pocket directions, but didn't let it win! I think these came out really cute - they wanted to wear them as soon as I finished sewing the buttons on, even though they had to wear them over long sleeves and long pants since it was only 60 degrees out!

Untitled

Wednesday, April 24, 2013

KCW Spring 2013 Day 2: Lots o' Shorts!

Space Invaders Shorts

Yesterday I managed to finish up several new pairs of shorts for Ben. Using my modifications from yesterday, I based these on the Quick Change Trousers pattern. I think they all turned out pretty cute! He will be stylin'!

Alligator Shorts

Surfboard Shorts

Dumptruck Shorts

Sailing Shorts

Pirate Shorts

I also sewed up two popover sundresses for the girls. I used what I had in the stash for the ties (store bought bias tape), and added a bit of ric-rac to Ellie's dress and some pink piping to Samantha's. I may add more ric-rac to the hem of both dresses, but right now I like them the way they are.

Ellie's Dress

Samantha's Dress

More dresses on deck for the rest of the week!

Tuesday, April 23, 2013

KCW Spring 2013: Day 1

Kid's Clothing Week started yesterday and I already feel behind! Last year I had lists and had everything cut well ahead of time. I did pull fabrics and patterns last week, but was feeling frustrated about matching fabric to patterns. Admittedly, part of my problem is that I buy fabrics I like and don't necessarily have a plan for what to make with them. This usually ends up meaning that I don't have enough fabric to make anything. I eventually managed to match up a few things. I'm not making nearly as many items as I did last fall, but the girls don't really need anything - several of their dresses from last spring  and summer still fit, which is nice!

New tee and shorts

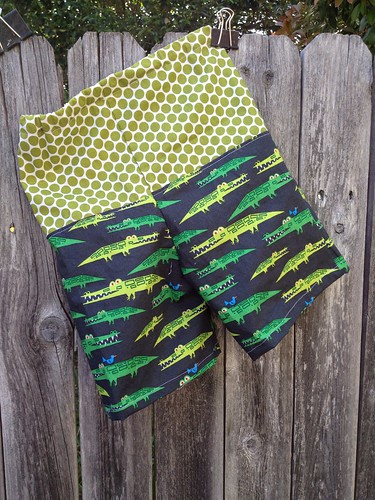
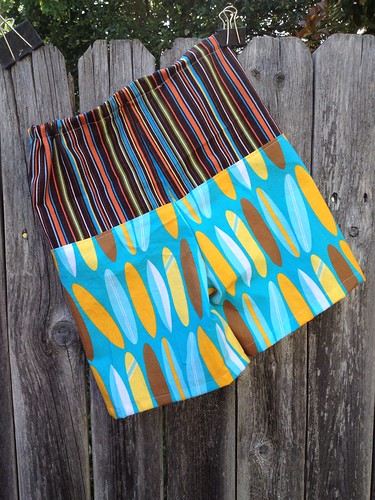
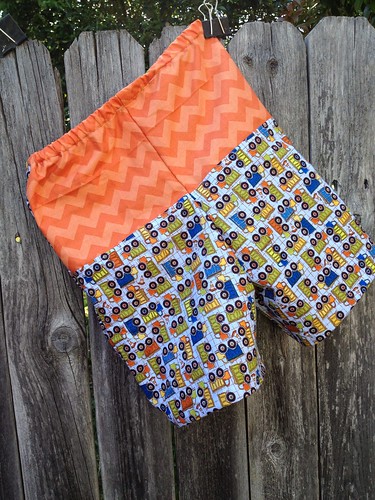
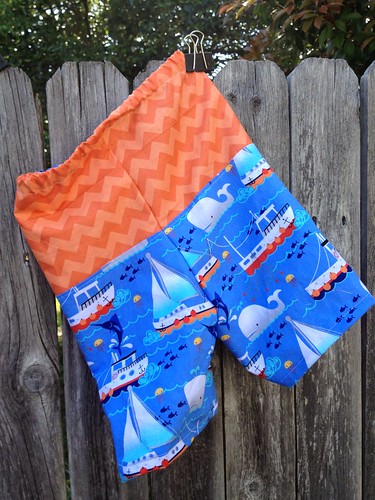
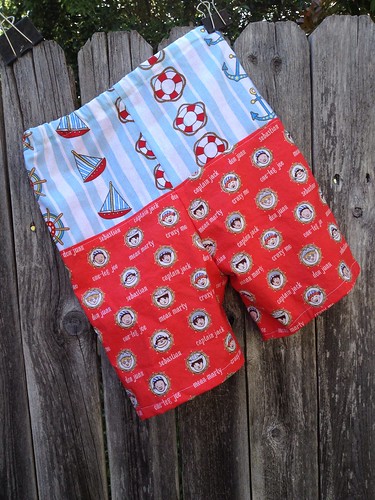
Ben needs the most - as the first boy he doesn't have many hand me downs. I purchased several cute half yards of fabrics the last time I was at my LQS and I had a few stashed away. I wanted to make a short version of the Quick Change Trousers. However, I wanted it to be shorts, and not have the double thickness since it gets so hot here. So I drafted a pattern based on the pants and a pair of his shorts that fit well. I added 1.5" to the top and bottom of my pattern to allow for a hem and elastic casing (you don't hem the pants more than a 1/4" and the elastic casing is inserted between the two pairs so you don't have to allow extra fabric to fold down for a casing). I figured that if this pair didn't come out great they could be pjs! However, I think they look pretty good! I'm a little concerned that they aren't long enough through the crotch, but hopefully we'll be potty trained before the end of the summer and then he'll have plenty of room.

His shirt is the Envelope Tee from Growing Up Sew Liberated. I've made it before, but wanted to lengthen the 18-24 month size in hopes that it would fit all summer! I used this pattern before by using one of my old shirts (which I guess I didn't blog). I have several old nice quality tshirts from Banana Republic and the Gap which are too short in the torso for me. With the one last summer I was easily able to get all of the pattern pieces cut from one shirt. With a larger size shirt, I had to get creative. So I cut the sleeves off the shirt (they are all short sleeved) and used that for Ben's sleeves! Even less hemming! I also lengthened the shirt by an inch by placing the pattern piece above the hem and then not having to hem. Again, this one was a trial run - I wasn't sure if using my sleeves for his sleeves would work, but it did! I've got a stack of shirts ready to be repurposed!

Pretty as a Picture Dress

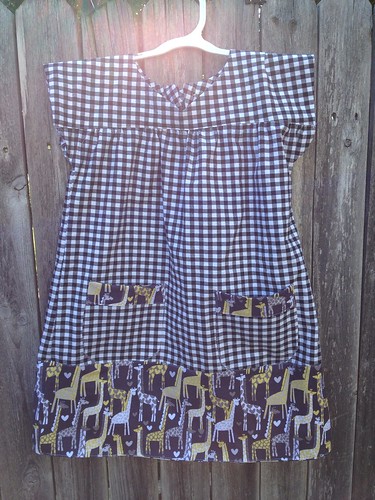
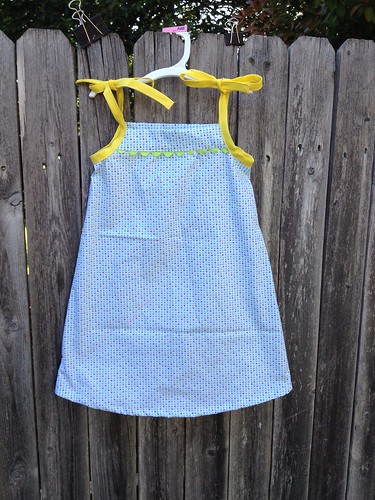
I cut the pattern pieces for the Pretty as a Picture Dress from Handmade Beginnings for Ellie last fall, but decided that she didn't need any more dresses at the time and I didn't have a piece of fabric for the focus fabric that I loved. I received the sheep print in a fat 1/8"s bundle and have been saving it for something cute. I used the leftover pink floral fabric from the girl's Valentine's Dresses (also unblogged!). I think it came out pretty cute, and is just the right size! If I made it again the one thing I would do would be to serge the seam between the bodice and skirt before I sewed in the elastic - it's a bit messy.

Simplicity 2377

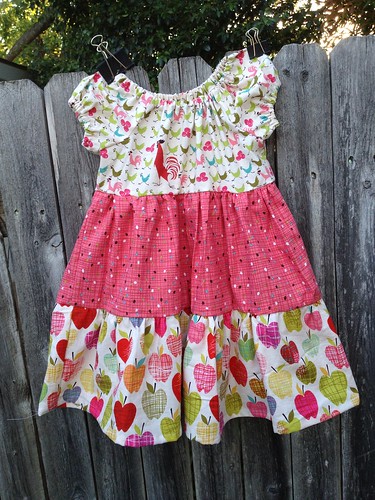
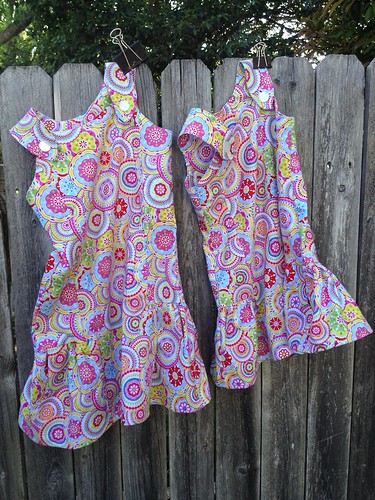
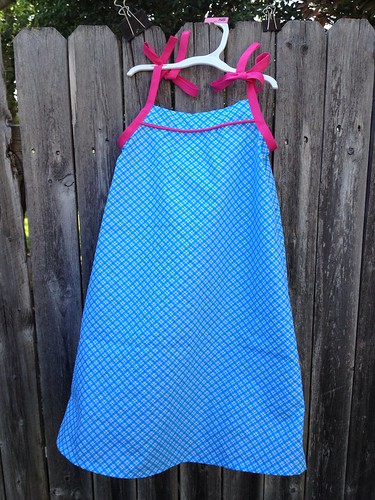
Finally I made Samantha a new dress. I used Simplicity 2377 and made a size five. It is plenty big around and just a touch short - not too short but it probably will be before too long. I left off the ties in the back, and inserted all the elastic at the end, instead of as you go like the pattern directs. I also serged the seams between the tiers of fabric.  All the fabric is from the Alexander Henry farmdale collection. I really loved it and waited too long to buy it. My JoAnn's had these prints and the green crosshatch. I had just enough of each print to make this dress. I'd say it was a good use of fabric! It has already passed the twirling test! :)

Of course, it is too cold here today to wear summer clothes, so these will have to wait. I've got plans for more shirts for Ben, more shorts and matching Seashore Sundresses for the girls to sew up today! Maybe some popover sundresses will sneak in there too!

Monday, April 22, 2013

Modern Half-Square Triangle Quilt-a-Long Block 33

Welcome! If you are just joining us, information about materials can be found here, and here are the previous blocks: Block 1Block 2Block 3Block 4Block 5Block 6Block 7Block 8Block 9Block 10Block 11Block 12Block 13, Block 14Block 15Block 16Block 17Block 18Block 19Block 20Block 21Block 22Block 23Block 24Block 25Block 26Block 27Block 28Block 29Block 30Block 31Block 32.

Block 33


Materials:
8 3.5" squares of Color A
8 3.5" squares of Color B

*note* these are the essential materials for each block, so you can cut several blocks worth of fabric at once to save time!

Create your blocks, following the same procedure as last week. If you need help making your blocks, please see this post. You should end up with 16 2.5" squares. Ready to lay out your block? Here we go!


ROW 1


ROW 2


ROW 3


ROW 4

After you have sewn your squares into rows, press your seams. I like to press odd numbered rows to the left, and even to the right. It helps to use a small piece of paper to number your rows. I like the tiny post-it notes. 

After pressing, you are ready to sew your rows together! Pin, if necessary, but I find that these short rows don't require pinning.

Block 33

Press one final time, and voila! Another finished block! Only 39 to go! Pat yourself on the back! Remember to add your blocks to our flickr group!

Please, if you have questions, email me at knitnlit AT gmail DOT com, or make sure you leave your email address in your comment. I've had several folks ask questions in the comments, but if you are a no-reply commenter, I can't email you back. 


Monday, April 15, 2013

Modern Half-Square Triangle Quilt-a-Long Block 32

Welcome! If you are just joining us, information about materials can be found here, and here are the previous blocks: Block 1Block 2Block 3Block 4Block 5Block 6Block 7Block 8Block 9Block 10Block 11Block 12Block 13, Block 14Block 15Block 16Block 17Block 18Block 19Block 20Block 21Block 22Block 23Block 24Block 25Block 26Block 27Block 28Block 29Block 30Block 31.

Block 32


Materials:
8 3.5" squares of Color A
8 3.5" squares of Color B

*note* these are the essential materials for each block, so you can cut several blocks worth of fabric at once to save time!

Create your blocks, following the same procedure as last week. If you need help making your blocks, please see this post. You should end up with 16 2.5" squares. Ready to lay out your block? Here we go!


ROW 1


ROW 2


ROW 3


ROW 4

After you have sewn your squares into rows, press your seams. I like to press odd numbered rows to the left, and even to the right. It helps to use a small piece of paper to number your rows. I like the tiny post-it notes. 

After pressing, you are ready to sew your rows together! Pin, if necessary, but I find that these short rows don't require pinning.

Block 32

Press one final time, and voila! Another finished block! Only 40 to go! Pat yourself on the back! Remember to add your blocks to our flickr group!

Please, if you have questions, email me at knitnlit AT gmail DOT com, or make sure you leave your email address in your comment. I've had several folks ask questions in the comments, but if you are a no-reply commenter, I can't email you back.